|
Cost Effective Uses of Fabrication Technique.
Topics included in this Document:
Although most of the characteristics of various materials
are available on "Material Specification Sheets" there
have been a few changes in the industry over the years
that spec sheets won't tell you. Here are a few tips
that will keep your part costs down and get them to
you quicker.
About Acrylic Colors
Acrylics that used to be manufactured in a wide range
of colors, as "stock", are now only available by special
order, and usually with fairly large minimum quantity
requirements. Suppliers occasional have small amounts
of non-stock items available but that doesn't mean they'll
be there next time.
 Tip:
If you're unsure about the color being "stock" and you
think you'll be making this part in the future, check
with your Supplier to see if what you're looking for
is a stock item. Tip:
If you're unsure about the color being "stock" and you
think you'll be making this part in the future, check
with your Supplier to see if what you're looking for
is a stock item.
About Brand Names
In the old days, certain manufacturers that pioneered
the Acrylic markets established "Trade Names" that have
stuck in the minds of most engineers. Quite often, these
trade names appear on drawings in place of the generic
word "Acrylic". In today's market place however, many
competitive brands of acrylic are now available and
some with much higher quality standards. Being in the
industry, we have an opportunity to observe "quality
trends" between manufacturers and we can purchase accordingly.
We will select from those brands that are currently
providing the most consistent performance.
Tip:
Don't limit us to a specific Brand Name unless absolutely
necessary. It's better to say: Material: Brand X or
equivalent.
Thickness
Materials, in general, are produced to standard "Manufacturers
Tolerances" with regards to thickness. (Usually, + or
- 10%. ) Fabricators must manufacture your parts in
spite of these variances. Often times, engineers will
design parts with bonded or bent sides, and do not consider
the amount of thickness variations that the Fabricator
must deal with. Your costs are effected drastically
when we are required to maintain dimensions that result
from a compounding of material variations.
Tip:
Care should be taken to consider stock thickness variations
and allow wider tolerances in situations that allow
it.
Additionally, Many materials are now being manufactured,
and are available, only in "Metric" sizes. We still
see drawings calling out (.125 ) when the material is
only made to 3 mm (.118)
Tip:
Engineers should have current "Spec Sheets" available
to assist them with the dimensioning of their parts.
We should note here that; Material can be special
ordered to "Mil Spec" thickness, or, we can "Pre-Select"
material and use only those pieces that fall within
specific tolerance ranges. Either of these processes
are available to you but will increase the overall cost
of your product.
Tip:
Keep in mind that; We will quote and produce your parts
exactly to what you ask for on the drawing. Cost effective
engineering requires that you consider your needs as
well as our ability to manufacture the part efficiently.
< Back to Top
 Acrylics,
Polycarbonate. and A.B.S. Acrylics,
Polycarbonate. and A.B.S.
The Bonding of plastics is more of an Art than a Science.
One could write page after page with regards to Bonding
Technique and Quality. But, for this document, we can
avoid discussing to much detail about "Technique", and
concentrate instead on "Results", since this is more
applicable to the engineering process.
Acrylics.
There are different levels of quality with regards
to Acrylic bonding We have attempted to establish a
Quality Rating System that can be used to standardize
the requirement so that both Engineer and Manufacturer
are talking "apples to apples".
Following is a brief description of how each bond
is achieved and the associated result.
Class 1. This is a "Bubble- free bond". Used
in highly visible "appearance" applications. Sometimes
referred to as Museum Quality. Bubble-free bonding requires
more work. The mating pieces must have a very good surface
finish prior to assembly. Additionally, assemblies require
more time to dry, resulting in longer production times.
It also takes a Fabricator with more experience to produce
Bubble-free results consistently. Therefore: Bubble
Free bonding is the most expensive.
Class 2. This is the most "typical" bond. With
Class 2 bonding, the assembly is made with routed and
cleaned surfaces, using a mixture of Methylene and Ethylene
Chlorides and some directed pressure. The result is
a Bond that is "Nice" but "Less than perfect". This
is usually considered a high production bond, and is
intended to provide the "Biggest Bang for the Buck",
by delivering an attractive product at a reasonable
price. Minor appearance flaws are to be expected. With
thoughtful design, these imperfections can be hidden
by the use of colored or tinted materials. The majority
of our production is done with this technique and is
quite acceptable for most applications.
Class 3. Bonding directly to a sawn edge will
show the saw cuts. This is the least expensive method
to choose. It is intended for structural performance
only. If you are designing a guard for your machine
shop, or some other in-house use where cosmetics aren't
important, you should note this on your drawing and
it will help keep your costs down.
Tip:
Choose your bond requirement according to the desired
end result. Help keep your costs down by specifying
the Class level expected.
Bonding Polycarbonate.
The process of bonding Polycarbonate is very similar
to Acrylic except that the results are quite different.
Esthetically, Acrylic is by far superior. Polycarbonate
has a tendency to turn "milky" when bonded. Additionally,
bubbles are sometimes a problem. Strength, Impact Resistance
and a higher Burn Rating are the main points for choosing
Polycarbonate. If cosmetics are important, try to avoid
bonds altogether, and consider designing your part to
accommodate "Strip Bending" instead. ( see Strip Bending
)
Tip:
Specify cosmetic requirements and give the Fabricator
the option to Bend instead of Bond.
A.B.S.
A.B.S. is a General Purpose material. It comes in
a variety of colors, with or without texture, and, is
considerably less expensive than Acrylic or Polycarbonate.
Bonding is relatively simple and good quality can be
achieved easily. A.B.S. bonds, provide a high degree
of structural integrity as well as excellent Cosmetic
qualities.
Engineers should note; When using textured materials,
the texture is on the surface only. Every bond will
therefore have an area, (the edge and thickness of the
material), without texture. For cosmetic purposes, this
should be incorporated into the design.
Tip:
Consider Vacuum Forming your ABS product and do away
with the bonding altogether.
< Back to Top
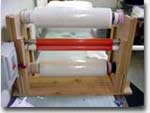
Process Overview.
Strip bending is a process by which material is heated
within controlled parameters in order to create the
desired result. By varying the width of the "Heat line"
the fabricator can create specific internal or external
radii. Once heated, the now pliable material can be
placed into a fixture or set-up and allowed to cool
and thereby maintain this shape. Although it may sound
simple enough, due to the many differences in materials,
it is actually quite involved. There are "bend allowances"
that must be calculated into the flat state dimensions,
and, these vary with thickness, radii and the many different
materials. The Fabricator must be creative in his approach
to fixturing while utilizing a variety of tooling, jigs,
and fixtures.
From this large group of variables come a few conditions
that are fairly constant. Conditions that are predictable
results of the strip bending process. We believe that
an understanding of this information is crucial if one
intends to design strip bent parts effectively.
Material thickness and Tolerances
Just as with bonding, there are thickness tolerances
to contend with. In general, try to not to design parts
that require tighter that + or - .010 across bent dimensions.
Tip:
Allow Standard tolerance for any strip bent details
of + or - .020.
Bow as a result of bending.
There is a certain amount of "bow" that occurs when
material is bent. As a rule, "the longer and narrower
a part is, the greater the bow." This can be minimized
by the use of a shallow "kerf". A kerf is a small groove
at the place where the bend occurs. The result is a
straighter part and increased consistency with regard
to dimensions. Keep in mind however, the use of a kerf
will eliminate any inside radius. There is also some
sacrifice to structural integrity because the kerf acts
as a scribe line on the inside surface. Pulling on the
part, as if to bend it flat again, could snap it apart.
Tip:
Use a kerf to reduce Bow. A kerf will reduce cost by
reducing the heat time required to bend your part.
Edge Flare. There is a certain amount of "flare" that
occurs at both ends of a bend. It is a result of the
fact that, the outside surface of the material has to
stretch farther than the inside surface causing it to
pull back while the inside bulges out. In a situation
that calls for the bend to be bonded to an end piece,
the part will have to be made long and the flare will
need to be cut off. On many simple U shaped parts, where
bonding is not required, engineers should make it clear
on their drawings by noting whether or not this flare
is permissible. Removing it will cost a bit more, and,
our first assumption is that you want it removed.
Tip:
Specify, "Flare Permissible" to reduce costs where applicable.
Stress from forming.
As with all types of thermoforming, Strip bending
creates stress in the material and future contact with
isopropyl alcohol may cause a condition known as "Crazing.
(small cracks along the heated area) Avoid all cleaners
with Isopropyl Alcohol in them.
< Back to Top
 Process
Overview. Process
Overview.
Vacuum forming is a process that requires selected
materials to be heated and pulled down over a mold.
Molds can be produced from many different materials
with consideration being given to, design confidence,
life expectancy, and cost. In many cases, V-forming
can drastically reduce the part cost compared to fabrication.
Engineers must not forget to consider, "draft angles"
and "material thinning" in the design and dimensioning
of their parts. The amount to which a material will
thin is a result of part design and starting thickness
of the material. Certain steps in the V-form process
can be taken to reduce the amount of thinning that will
occur, but, there are limits. A complete understanding
of the process is recommended before deciding to utilize
the V-form process.
Tip:
Consider making multiple molds that will increase yield
and reduce run time to maximize efficiency in the process.
This will keep costs down.
< Back to Top
Overview.
The quality of an Edge or Surface finish will depend
on the method used to produce it. In Fabrication, the
most common edge is produced with a "Router Bit". A
routed edge is typically a #63 finish, which is also
a typical machined surface. It is possible however,
to receive parts with a "Saw Cut" edge. A Saw Cut will
not meet #63 requirements and "blade marks" are clearly
visible. If you do not specify a #63 surface finish,
a Fabricator is well within his rights to "Saw" material
to size.
Be aware! You may not like the results.
Here are a few different surface and edge finishes
commonly available.
Sawn Edges. As mentioned above, "Saw cut", which comes
straight from the Saw. Be careful to watch for "chipping"
that may occur along edges and at corners.
Routed edges are the most common. Router marks are
visible, but, because of their consistency, don't usually
harm the appearance.
A Sanded surface. Router marks can be removed by progressively
working your way down to a fine grit sandpaper. Starting
with 220 grit and finishing with 600. This is pretty
time consuming and will drive the cost of production
way up. It is a prerequisite for polished parts that
require "Clear Surfaces" with very little distortion.
Buffed or Flame Polished Edges can be buffed to a
high gloss or they can be Flame Polished. Buffing and
Flame Polishing are good ways to improve the esthetics
of a part. Most of the time, Flame polishing is used
right over a Routed surface. Do not allow a buffed or
Flame Polished surface to be cleaned with Isopropyl
Alcohol.
Polycarbonate can not be Flame Polished. It has a
tendency to turn black. The best way to polish Polycarbonate
is to "Solvent Polish". Using great care, the Fabricator
will apply a solvent mixture of Methylene and / or Ethylene
Chloride, either as a liquid or vapor, to the area to
be polished. The result is a highly polished surface.
Tip:
Keep in mind that, the quality of the polished surface
is relevant to the starting condition of that surface.
Therefore: A polished Saw Cut edge will still show the
blade marks. A polished routed edge will still show
the router marks.
< Back to Top
There are a number of different ways to remove sharp
edges or burrs from plastics. With most parts, a variety
of hand tools are used, to which, the quality of the
work depends on the skill of the operator.
Small parts are often "Tumbled" in a parts tumbler
(very similar to a Rock Tumbler) with different sized
media. They are tumbled along with some sort of liquid,
such as soapy water or coolant. You must be specific
if residues from particular solutions will contaminate
your parts. Tumbling may also leave a uniform, frosty,
surface over the entire part because the media comes
in contact with more than just the edges.
Flame polishing will also remove burrs from Acrylic.
Tip:
In most cases a note to "Break all sharp edges" is adequate,
but, if you're concerned about finish or contamination,
specify, "Do Not Tumble" on your drawing.
< Back to Top
 Once
a part is manufactured, it goes into "Final Packaging".
Here the part is stripped of its original protective
paper and inspected for cosmetic flaws. Upon passing
this inspection it must be protected once again. After
cleaning we apply a layer of transparent film called
"Register Check". Many times Register Check can stay
on to protect your parts right through assembly. You
may even wish to ship them that way. Once
a part is manufactured, it goes into "Final Packaging".
Here the part is stripped of its original protective
paper and inspected for cosmetic flaws. Upon passing
this inspection it must be protected once again. After
cleaning we apply a layer of transparent film called
"Register Check". Many times Register Check can stay
on to protect your parts right through assembly. You
may even wish to ship them that way.
Parts may also be wrapped in tissue or simply placed
into a Poly Bag. All Packaging requirements must be
clearly stated either on the print or in your Company's
"Packaging Standards"
Tip:
Clearly state packaging requirements. Do not assume
them.
< Back to Top
Part Marking may be required. In these instances,
it is important to provide instructions as to the location
and size of characters desired. You may also wish to
have us "bag and Tag" when parts are too small or odd
shaped.
When requesting "Part Marking", keep these things
in mind:
- What is the purpose for which part marking is required?
- Is it for Incoming Inspection or Field Service?
- Inventory Control or Assembly?
A clear understanding of it's purpose will enable
you to choose the most "cost effective" method to suit
your needs. It is much cheaper to have us Bag and Tag
in lots of 25, than to individually bag and tag. For
example, you wouldn't want to pay to have us individually
tag 1000 washers!
You can also request "anti-static packaging" for static
sensitive areas.
Tip:
Be specific about your part marking needs.
< Back to Top
Parts should be cleaned using a soft cotton cloth
with mild soap and water or a qualified plastic cleaner.
Your Fabricator should be able to make a recommendation
that suits your particular needs.
< Back to Top
Also see our material
care section for details regarding care for polycarbonates.
|